Blog
YA Weekly Magazine Spread
YA Weekly Magazine Spread
One of my dreams is to work for The Church of Jesus Christ of Latter-day Saints. Their communications and media departments are world class. Everything that is produced is professional and has been crested with great care. I was thrilled with the idea of creating a magazine spread that could be found in the YA Weekly magazine. I found a great article on education that I decided to use for the copy.

Before beginning I determined the following:
Audience: My audience is young adults or college age students between the ages of 18-30. The magazine spread will be gender neutral to appeal to both sexes and will not be location specific. Although, it will not be specific to one location, it is for people who are primarily members of the church, so there will be a focus on church education systems.
Message: (What is the one thing I want to communicate to my audience through my design?) I want to convey to my audience that learning is an important commandment from the Lord.
Application used: Adobe InDesign
Photograph Attribution: Bailey Rindlisbacher
Article attribution: The Lord’s Charge to “Seek Learning” by Mindy Selu
Typography
Typeface #1 Name: Feltro
Typeface #1 Category: Decorative
Typeface #2 Name: New Order Light
Typeface #2 Category: Sans Serif
Typeface #3 Name: Museo Slab 300
Typeface #3 Category: Slab Serif
Color Scheme

I wanted to do brighter colors to grab people’s attention without being too overbearing. I really liked the blue and yellow/green color together. So, I took this palette and used lighter tints. I also wanted the colors to be clean and crisp. The yellowish color also is a stereo typical highlighter color that would help the reader identify that this is an article about education. The colors also complement each other well. Blue is a cooler toned color, while the yellow/greenish color is much brighter and warmer. Young adults are still fun so there is a need for color, but the magazine spread does not need as much color or as bright of colors compared to children for example. Lastly, I thought the colors were gender neutral and would appeal to both sexes.
1 Peter 2:9
“… You ‘are a chosen generation, foreordained by God to do a remarkable work—to help prepare the people of this world for the Second Coming of the Lord!”


Design Analysis
Target Audience Appeal: My target audience is young adults 18-30 who are members of the church. This design appeals to them because it shows the photos feature people within that age range, which makes it more relatable. The colors are also bright and grab the audience’s attention. Young adults also aren’t super serious, so instead of using circles I incorporated more fun, abstract shapes like triangles. These shapes also give the article a slightly edgy, which appeals to a younger audience. The series of triangles on the second page also combine to form mountains, which represents adventure and a thrill that young people are often looking for. Furthermore, the church owned-schools like BYU Provo, BYU-Idaho and BYU Hawaii are surrounded by the mountains and the students often go there on the weekends to get away. So, if you are a student that goes there the mountains are symbolic of the school and feel familiar.
Main Design Decisions: One of the first design choices I made was to highlight the article was about learning. I wanted that to be very clear. So, I made the word ‘learning’ in the title much bigger than the rest of the title. I also wanted the word to look like it was written out with chalk, so I used a decorative font. I also put a yellow block behind it to make it stand out and look like a highlight stroke. I did not want to leave too much white colored space, so I added a blue block underneath the text on the first page. Then I continued to incorporate blue and yellow colors on each page. To create contrast and make the magazine spread visually interesting, each page layout is different. Some pages have quotes, some have pictures, and some have triangles or rectangles. However, the design principles, color, and typography work together to create unity throughout the spread.
Principles of Design Analysis
Contrast
One of the examples of contrast is typography! The serifs in the title stand out against the body font which has no serifs. Then, the decorative font is vastly different from them both. The blue and yellow blocks/triangles contrast against the white color. There is a large contrast on the third page where the wrapped text around the photo contrasts against the normal, rectangular shaped body text. The pull quote also exemplifies the principle of contrast. Parts of the quote are a different color or font. This adds contrasts and adds emphasis to the important parts of the quote. The subheadings are also contrasted from the rest of the body by making them bold.
Repetition
There are many repeated elements in this design. The typography is repeated throughout the design. The same fonts are used in the title and pull quotes, while the body text is typed in another style font. The subheadings also have a repeated bold effect. Last there is repetition of triangles and the colors yellow and blue on each page.
Alignment
Since the picture on the front page is on the right side, the title has a left alignment. The body text is divided into two columns and with a right alignment. On the second page, the mountains and the pull quote span the top and bottom of the page. They are aligned with one another in the center. The triangle on the third page is centered on the right side of the page. The tip of the triangle aligns with the second column.
Proximity
On the front page, the first part of the title is close to the word ‘learning’ so the viewer knows that they are related and that it is meant to be read as part of the title. Furthermore, there is a return space between each new subsection. This separation lets the reader know that there is a change in the topic. However, there is no return space between the subheading and the new subsection. That allows the reader to connect the subheading title to the new paragraph of body text. Another example of proximity is the three triangles at the bottom of the second page. These shapes all overlap a little bit, which tells our brain to see the shapes as one connected design. Therefore, rather than seeing three separate triangles, our eyes recognize them as a mountain range.
Color
I wanted to use brighter colors in this article to make it stand out. The yellow is much more vivid, whereas the blue is a lighter tint. The yellow, white, and blue add a very crip and clean look to the design. These colors complement each other well, because blue is a cooler toned color, while yellow is much brighter and warmer toned.
Typography
I used three different fonts in this design. I used a large decorative font for part of the title to make the word ‘learning’ stand out. Then, I used a slab serif font for the rest of the title. The serifs add a typewriter look that is often related to school or scholarly works. The fonts in the title are contrasted with a very simple San Serifs font in the body. The simplicity of the body text draws the viewer’s attention to the title and the pull quote.
Kansas City Icon Set
Kansas City Icon Set
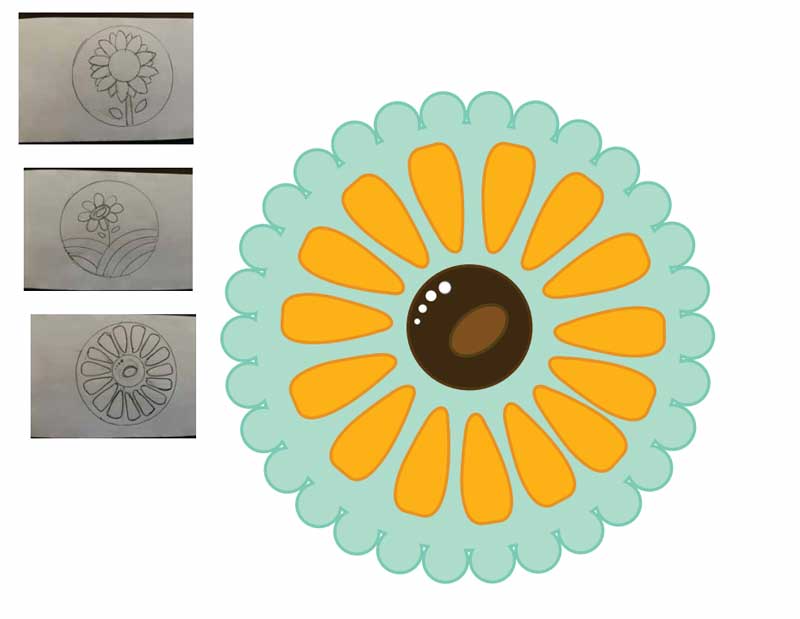
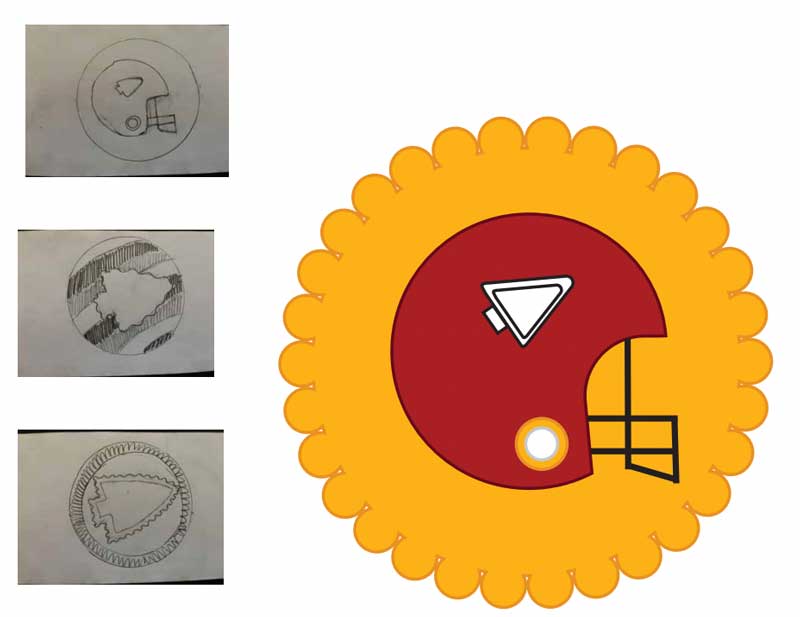
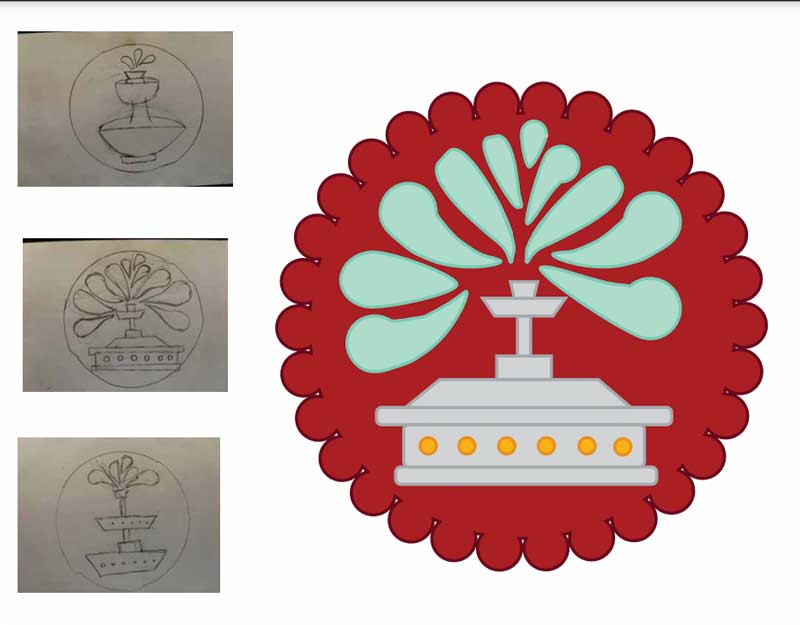
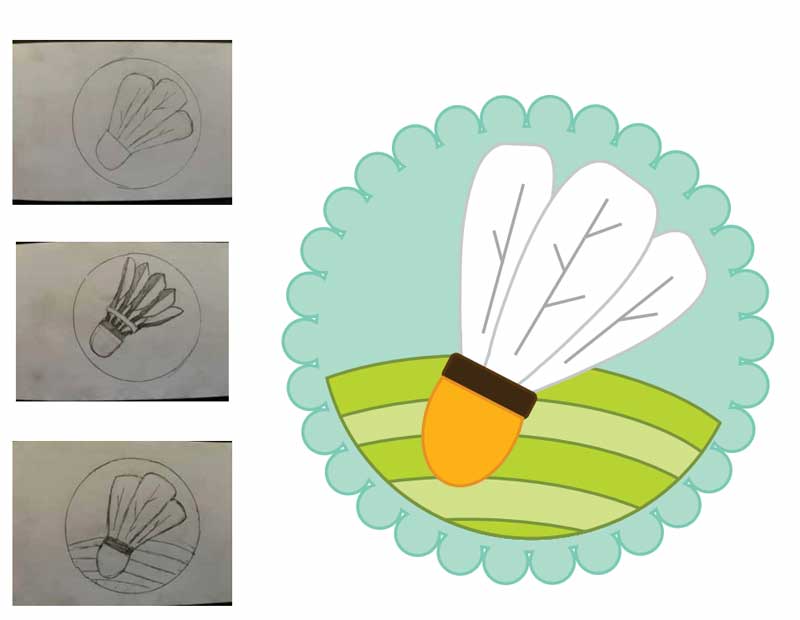
My goal was to create a graphic design project that reflected where I was from. I’ve been living in Kansas City for the past 7 years and call it home. It is a city rich in culture, history, and pride. I decided that I would create four icons that represent Kansas City. After brainstorming a list of more than 25 iconic symbols, places, and things in the city I narrowed it down to these four: a fountain, Chief’s football helmet, a large badminton, and a sunflower. If you know Kansas City or have ever visited, you will be able to recognize these four symbols!

Before beginning I determined the following:
Audience: Teenage/young adult girls (14-25) who live in or are visiting Kansas City.
Message: (What is the one thing I want to communicate to my audience through my design?) Kansas City is a beautiful and fun place to visit.
Application used: Adobre Illustrator
Sketching & Rough Draft
Color Scheme

After getting an outline and a general idea of how I wanted the icons to look I chose a color scheme. A good color scheme is extremely important in communicating the message you want to send to your target audience.
These are the three main colors I decided to use in my project. I chose yellow because Kansas is known as the Sunflower state. You can always find those smiling yellow flowers in the summer and fall. Additionally, there is a famous art museum in Kansas City that has GIANT badmintons scattered across the front yard. Besides their giant size, what distinguishes these badmintons the most is their bright yellow/orange colored tip. Then, I chose red to have a darker color and create contrast. Red and yellow are also the Kansas City Chiefs’ colors and are easily identifiable by any KC sports fan. Finally, I chose a seafoam blue color. Kansas City is known as the city of fountains and has the second most fountains in the world after Rome. I knew that a fountain was a design I wanted to incorporate, and I would need to use a blue color for the water. Additionally, yellow, red, and blue are the primary colors so I knew they would work well together. Kansas City is also an older city, rich in history. I wanted to create a retro vibe with deep colors, yet bright enough to represent the hustle and bustle of the city.
KANSAS CITY
TWO STATES, ONE CITY


Design Analysis
Target Audience Appeal: This design is girly, especially with the scalloped edge. Each icon portrays a Kansas City identifiable object. The sunflower is the Kansas state flower and is an icon that would only draw the attention of young girls. The colors are bright and fun, which draws the audience’s attention. The color scheme is strong and maintained throughout all four icons which creates visual appeal. I could see these sold as a sticker set in one of the many KC themed boutiques or spirit stores.
Main Design Decisions: I wanted the design to be fun, so I decided to not have any harsh edges unless necessary. For example, the mask portion of the helmet is straight with harsh angles and edges. I wanted the sunflower petals to be big and stand out with a bright yellow color! I decided to keep the large, rounded shape of the petals and use them as a base for creating the spewing water and feathers on the badminton. I also repeated the circle shape in all the designs e.g., in the middle of the sunflower, the details on the fountain, the semicircles that make up the grass on the badminton, and the large circular helmet. All these circles make the design look more cohesive and create unity. There is subtle detail in each design, but overall has a clean and simple look. Furthermore, to make a unified I added the same scalloped edge on all the icons. Lastly, I wanted each object (the flower, fountain, badminton, and helmet) to stand out and be bold. So, each object fills the majority of the white space on each icon, while still leaving sufficient white space for your eye to rest.

Principles of Design Analysis
Contrast
The biggest example of contrast is in the color. You have bright colors like the yellow the is contrasted with a darker red, or lighter blue. Also, the deep brown center of the flower is contrasted with the bright yellow all around it which makes it stand out. The strokes on each object are also darker, making the fill color pop. The second element of contrast is the minute details versus the large, rounded look of each object. For example: the fountain has small yellow circles which contrast against the large, rounded shape of the spewing water, the flower also has small little circles in the middle which contrast against the bigger circles already in the center, the badminton has small lines on the inside of each large feather, and the helmet has the smaller detail of the arrowhead inside the large, rounded helmet.
Repetition
There is lots of repetition in this design. There is repetition of the colors blue, red, and yellow. There is repetition of the large, rounded ends on the petals e.g., water, feathers, helmet, the small earpiece circles on the helmet, the shape of the green grass etc. The scalloped edge around each icon is also repeated. The flower petals are duplicated around the center and the water droplets are reflected and repeated on each side. The semicircular shape of the grass is replicated and has a repeated “every-other” green color pattern. Finally, every object and part of the design has a 3 pt. stroke around it.
Alignment
Since the main shape of each icon is a large circle, the objects are all centered in the middle. There is equal distance from each object to the scalloped edge. Most of the objects are connected or touching another shape, which lets the audience’s eye know that the various shapes all together create one completed design.
Proximity
I really like the proximity of the flower petals and the water. They are not attached together at a single point. Instead, they are equally spaced out and reflected around a central point. The spacing in-between the center point and the petals/the water are all the same. For example, in the flower the petals are all equal distance from the middle of the flower, but they are still close enough together that you can tell the oval shape of the petals and the round center are related. They are meant to be seen as one cohesive object —> a sunflower!
Color
There is a lot of color in these icons! I wanted the colors to be bright, while maintaining good contrast. I decided to fill in the strokes with color so that it would pop (aka be more contrasted). Each stroke is also just a shade or two darker than the fill color. Yellow, red, and blue are all primary colors and work well together. Then there are small hints of white, black, or deep brown that help balance out the bright colors.
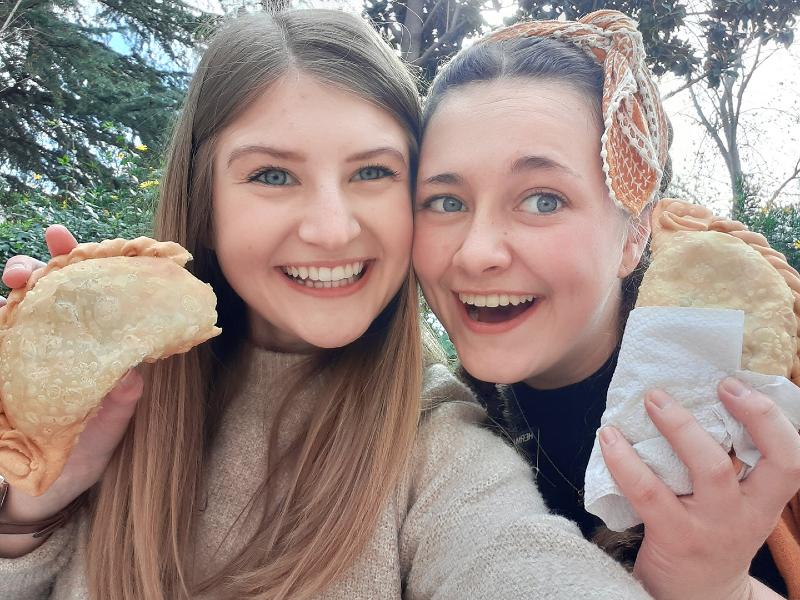
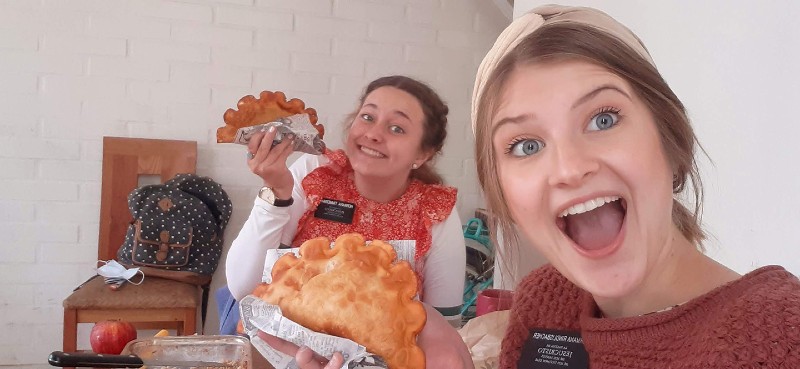
¡Viva Chile Sticker Set!

¡Viva Chile Sticker Set!
Die Cut Stickers- Perfect for laptops, water bottles and more!

Drafting


A work in progress
I applied the feedback they gave me and continued working on the empanada. I used pictures from the mission to really help with this. Every empanada is so different; some are baked, some are fried, some are square, and some are round. I chose to make the scallop-like crust (because that was my favorite kind) and wanted the dough to fold over one another. Here is my process from my original empanada to the final.

I also worked on the stamp edge a lot and played around with lots of different strokes and color combinations. Here’s how I improved:
")
¡El Producto Final!
The flower on the stamp is simple, yet elegant. Furthermore, the empanada has a few shadows and highlights, but few other details to preserve the simplistic nature of it all. I sent my final sketch some of my Chilean friends at they said, “GUAU!” (“WOW”) They recognized all the stickers and loved them!
See my work on Behance
")
Join
Work With Me
Rosehill Blooms Redesign
Rosehill Blooms Redesign
Meet Wendy! She is a stay-at-home mom who loves Dr. Pepper, running, and watching true crime. After 20 years she is finally putting her floral design and horticulture degree to use!
It all started from home making corsages and boutonnières for her children’s friends. In 2019, after much coaxing from her daughter, she decided to officially open up business and Rosehill Blooms was born. Little by little she started gaining more attention. Corsage and boutonnière orders skyrocketed to 85+ orders every weekend. Arrangements and bouquets galore were handcrafted! Fall and Christmas outdoor pots quickly became popular. She even began teaching her own DIY outdoor pot classes! Besides her gorgeous flowers, Wendy’s bright smile and outgoing personality is what has truly made her small business blossom!


Although proud of the business she had built, Wendy felt more could be done to expand her social media presence and increase clientele. However, with no formal marketing or social media training she had no idea where to begin. That’s where I come in!
Working with Wendy, my goal was to rebrand Rosehill Blooms! This would include the creation of a new logo, business cards, and optimizing her Instagram profile. Previously, there was no official brand design, font, colors etc. The business cards did not match the Instagram page, which did not match the floral design style. There was no unified aesthetic. I wanted her brand to have a voice and a distinct look. Something that would make Rosehill Blooms recognizable!
Creating the Logo

Through conversation and analysis of previous floral design work, I discovered that Wendy’s arrangements are very bright and use unique, wildflowers. I wanted the audience to know those things just by looking at the logo. I also wanted her business name, Rosehill Blooms, to be incorporated into the design. Roses and a hill were essential elements to include.
Logo in Action

I also designed the following business cards, stickers, and poster.

Utilizing your logo and brand colors as often as possible helps your audience begin to recognize you. The stickers will be used on top of flower boxes with matching ribbon. The business cards will be added to arrangements!


Rosehill Blooms
No occasion is the same, so neither should your flowers.


@rosehill.blooms
Apart from optimizing the bio, I also created new highlight bubble covers that matched the logo style and colors.
Instagram Bio Optimization
What makes you different?
Wendy described her floral design style in three words: Unique + Colorful + Custom
Who Are You?
Tip: Don’t actually put your name in the name section of your insta bio! Crazy I know! Instead change your name to who you are and what you do. For example: KC Wedding + Special Occasion Florist
Location
Location should be specific enough that people know where you are located, but broad enough to appeal to a general audience. Instead of putting the exact town she’s located in, I put Kansas City, KS.
Tag Line
“No occasion is the same so neither should your flowers.”
Call to action
Order a boutonnière or corsage by clicking on the link.
Shoot like a pro… on your PHONE!
A common myth in photography is that to take beautiful photos you have one of those fancy cameras with a big lens. I am here to tell you that is completely false! You don’t need anything more than your phone to start practicing your photography skills! Besides who wants to carry around a hefty camera everywhere? The best shots often come when we least expect it and with only a moments notice! So, learning how to shoot with your phone is a critical skill in this fast-paced world!
I went to Grand Tetons and was able to practice my phone photography skills! All photos were taken on an iPhone 13 and edited in Snapseed and Colourtone.
Point of View
Most of the time the only difference between a good photo and a great photo is changing your point of view. I love the example above! I found the most beautiful flower patch off of Jackson Lake. Instead of standing upright like the before picture, I changed my perspective and got down low. Look at what a difference that made! Then, I put this photo into my editing app Colourtone and used one of the free presets called Clean 1. This preset just slightly edited the picture. However, when using presents and filters I never leave them unchanged that way the edit becomes my own original work. For this photo I bumped up the contrast, exposure, vibrance, and lowered the shadows. The main reason I love this app is because it has HSL sliders that are included for free. I used the sliders to slightly adjust the green, yellow, and blue in the photo to my liking.
Here are a few phone photos I took that demonstrate a unique perspective.


Shallow Depth
Who doesn’t love a good portrait?! I am all heart eyes for how this photo turned out. Your phone can create an amazing shallow depth look on it’s own by using portrait mode. As you can see in the before pictures, the regular camera was quite wide and there was a lot in focus. With a simple swipe to portrait mode the camera automatically blurred out the background when I moved the camera closer to the subject. There was also a fence in the background that I wanted to cover up. So I picked one of the flowers and placed it in front of the lens. You can still see a bit of the fence, but that could be photoshoped out easily. However for the purposes of today, I want to show you what you can do with only your phone!! Again I added this photo to the same editing app Colourtone to add some warm and decrease the shadows. Very minimal edits were required because the lighting was beautiful!!


Panorama
You can never go wrong with a good panorama! Our eyes can see so much more than our phone can capture normally, which is why a panorama can be such a big help! One tip when taking panoramas is to hold still but move quickly. The longer you take to move your phone from side to side, the more camera shake you will get. Again, this photo required very minimal effort. I added a preset but lowered its overall amount on the photo. Then I increased the brightness and the contrast a little bit.

Long Exposure
You can also do really pretty long exposure photos. If you have an iPhone, change your camera to live. This will take a 3 second long video. Then within the photos app you can click on the live button and there will appear a drop down menu. Then chose long exposure. This will blur anything that was moving,. Then I opened the photo in Snapseed and used the HDR Scape tool to add definition to the water and rocks below. Isn’t it beautiful?
Our phones are truly amazing and have so many capibilities! Go out, explore, and try to capture something new using your phone. I promise the results won’t let you down! Leave a comment letting me know which photo was your favorite!
